# Demo of a dialog system with conversation management
[](LICENSE)


This sample shows how to build a dialog system within the AgentScope Runtime framework.
It contains following features:
- User authentication
- Conversation management: user can start a new conversation or continue a previous one.
- Storage of conversations: on SQLite.
- agent deployment management: the agent is deployed as a service.
 ## 🌳 Project Structure
```bash
├── backend # Backend directory, contains server-side scripts and logic
│ ├── agent_server.py # Script implementing agent-related server functionalities
│ └── web_server.py # Script acting as the web server, handling HTTP requests
├── frontend # Frontend directory, contains client-side code and resources
│ ├── public # Public folder, used for storing static files that are directly served
│ │ ├── index.html # Entry HTML file for the frontend app
│ │ └── manifest.json # Manifest file describing the web app's metadata, such as name and icons
│ ├── src # Source code folder, contains React components and associated files
│ │ ├── App.css # Stylesheet for the main app component
│ │ ├── App.jsx # JavaScript file for the main app component, written in JSX for React
│ │ ├── App.test.js # Test file for the App component, used for unit testing
│ │ ├── index.css # Global stylesheet affecting the overall appearance of the application
│ │ ├── index.js # Entry point for the React application, renders content into `index.html`
│ │ ├── reportWebVitals.js # Script for reporting web performance metrics
│ │ └── setupTests.js # Configuration file for setting up tests, typically using a testing library
│ ├── package.json # Project dependencies file, lists all npm dependencies and scripts
│ ├── postcss.config.js # Configuration file for PostCSS, used to process CSS with plugins
│ └── tailwind.config.js # Configuration file for Tailwind CSS, customizing styles and themes
└── README.md # Project documentation file, provides basic information and usage instructions
```
## 📖 Overview
This demo demonstrates how to build a chatbot with conversation management using AgentScope Runtime. It includes features such as:
- Multi-user chat support
- Session management
- Real-time messaging
- Local deployment capabilities
The implementation separates concerns between agent logic (backend) and user interface (frontend) for better maintainability.
## ⚙️ Components
### Backend
- `agent_server.py`: Implements the chatbot agent logic and conversation management
- `web_server.py`: Provides web service endpoints for frontend communication
### Frontend
- React-based chat interface
- Tailwind CSS for styling
- Real-time message updates
- Multi-user session support
## 🌵Architecture
The architecture of the demo is depicted in the following diagram:
```mermaid
graph TD;
U[User]
subgraph frontend[Frontend]
FLI[handleLogin]
FLO[handleLogout]
FC[createNewConversation]
FL[loadConversation]
FCS[fetchConversations]
FS[sendMessage]
end
subgraph backend[Backend]
subgraph WS[web_server]
FCS<-->|/api/users/user_id/conversations:GET|WGUC[get_user_conversations]
FL <-->|/api/conversations/conversation_id:GET|WGC[get_converstaion]
FLI<-->|/api/login:POST|WLI[login]
FC<-->|/api/users/user_id/conversations:POST|WCC[create_conversation]
FS<-->|/api/conversations/conversation_id/messages:POST|WSM[send_message]
end
C((Converstaion))
WS<-->DB[SQLite]
WS <-->C
WS <-->UU((User_id))
subgraph AS[agent_service]
ALM[LLMAgent]
ALD[LocalDeployManager]
ASS[InMemorySessionHistoryService]
end
WSM <--> AS
end
U<-->|Request|frontend
```
## 🚃 Dataflow
```mermaid
flowchart LR
A[User Access Application] --> B{Is User Logged In?}
B -->|No| C[Show Login Page]
C --> D[Enter Username/Password]
D --> E[Submit Login Request]
E --> F[Backend Validates Credentials]
F -->|Valid| G[Return User Data]
G --> H[Fetch User Conversations]
H --> I[Display Chat Interface]
F -->|Invalid| J[Show Error Message]
B -->|Yes| I
I --> K{Select Conversation?}
K -->|Create New| L[Create New Conversation]
L --> M[Add Welcome Message]
M --> N[Update Conversation List]
K -->|Select Existing| O[Load Conversation]
O --> P[Fetch Messages]
P --> Q[Display Messages]
Q --> R[Type Message]
R --> S[Send Message]
S --> T[Save User Message]
T --> U[Update UI with User Message]
U --> V[Call AI Service]
V --> W[Process AI Response]
W --> X[Save AI Response]
X --> Y[Update UI with AI Response]
I --> Z[Logout]
Z --> A
style A fill:#FFE4B5
style B fill:#87CEEB
style C fill:#DDA0DD
style F fill:#98FB98
style I fill:#FFA07A
style S fill:#FFD700
style V fill:#87CEFA
```
## 🚀 Getting Started
### Prerequisites
- Python 3.11+
- Node.js
- DashScope API key: you can apply for one at https://dashscope.console.aliyun.com/.
### Install
#### Prepare the database and env
Copy the database file `ai_assistant.db`.
```bash
cd backend
cp ai_assistant_example.db ai_assistant.db
```
You can modify the database file according to your needs.
It contains two initial accounts: user1 and user2.
Copy the `.env.template` to `.env`
```bash
cp .env.template .env
```
The `DASH_API_KEY` is the API key of DashScope.
#### Install the python packages
```bash
pip install -r requirements.txt
```
#### Install the npm packages
```bash
cd ..
cd frontend
npm install
cd ..
```
### Run
#### Run the agent server
Open a terminal and run the agent server.
```bash
cd backend
python agent_server.py
```
It will listen on 8090.
#### Run the web server
Open another terminal and run the web server
```bash
python web_server.py
```
It will listen on 5100
#### Run the frontend
Open another terminal and run the frontend.
```bash
cd frontend
npm run start
```
It will listen on 3000. Open your browser and go to http://localhost:3000.
### Usage
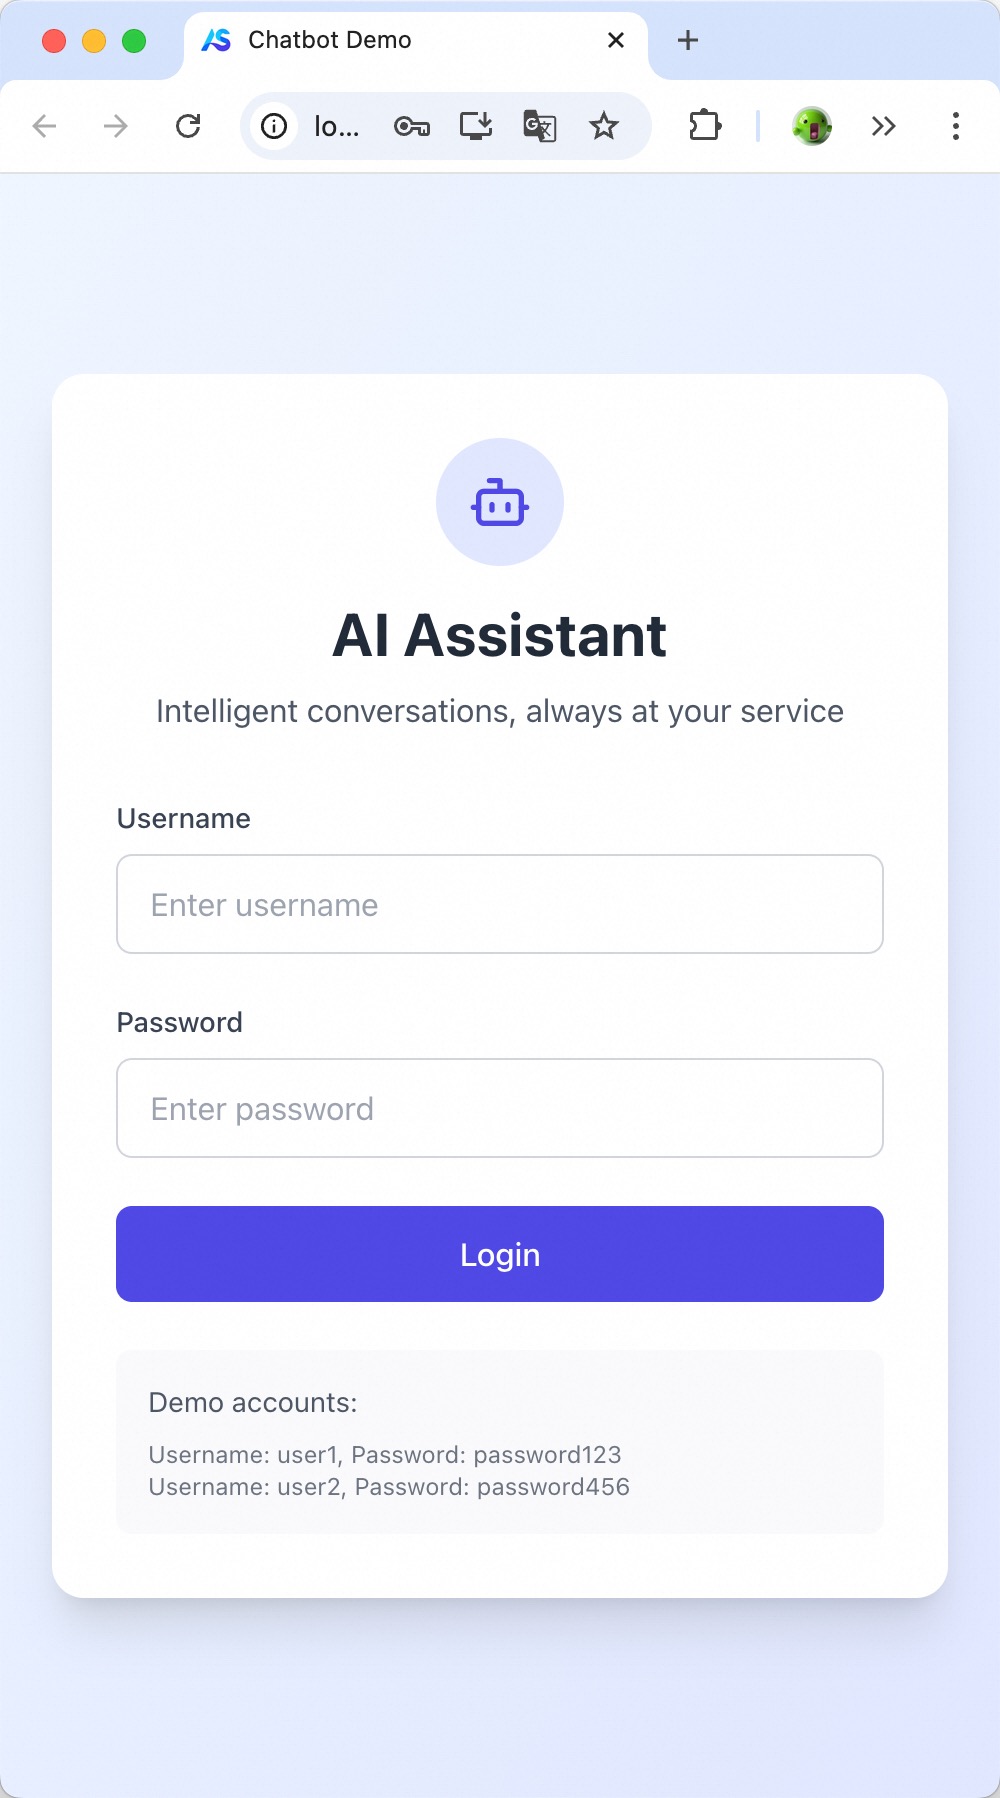
1. Login in with initial account, e.g. user1 and password123.
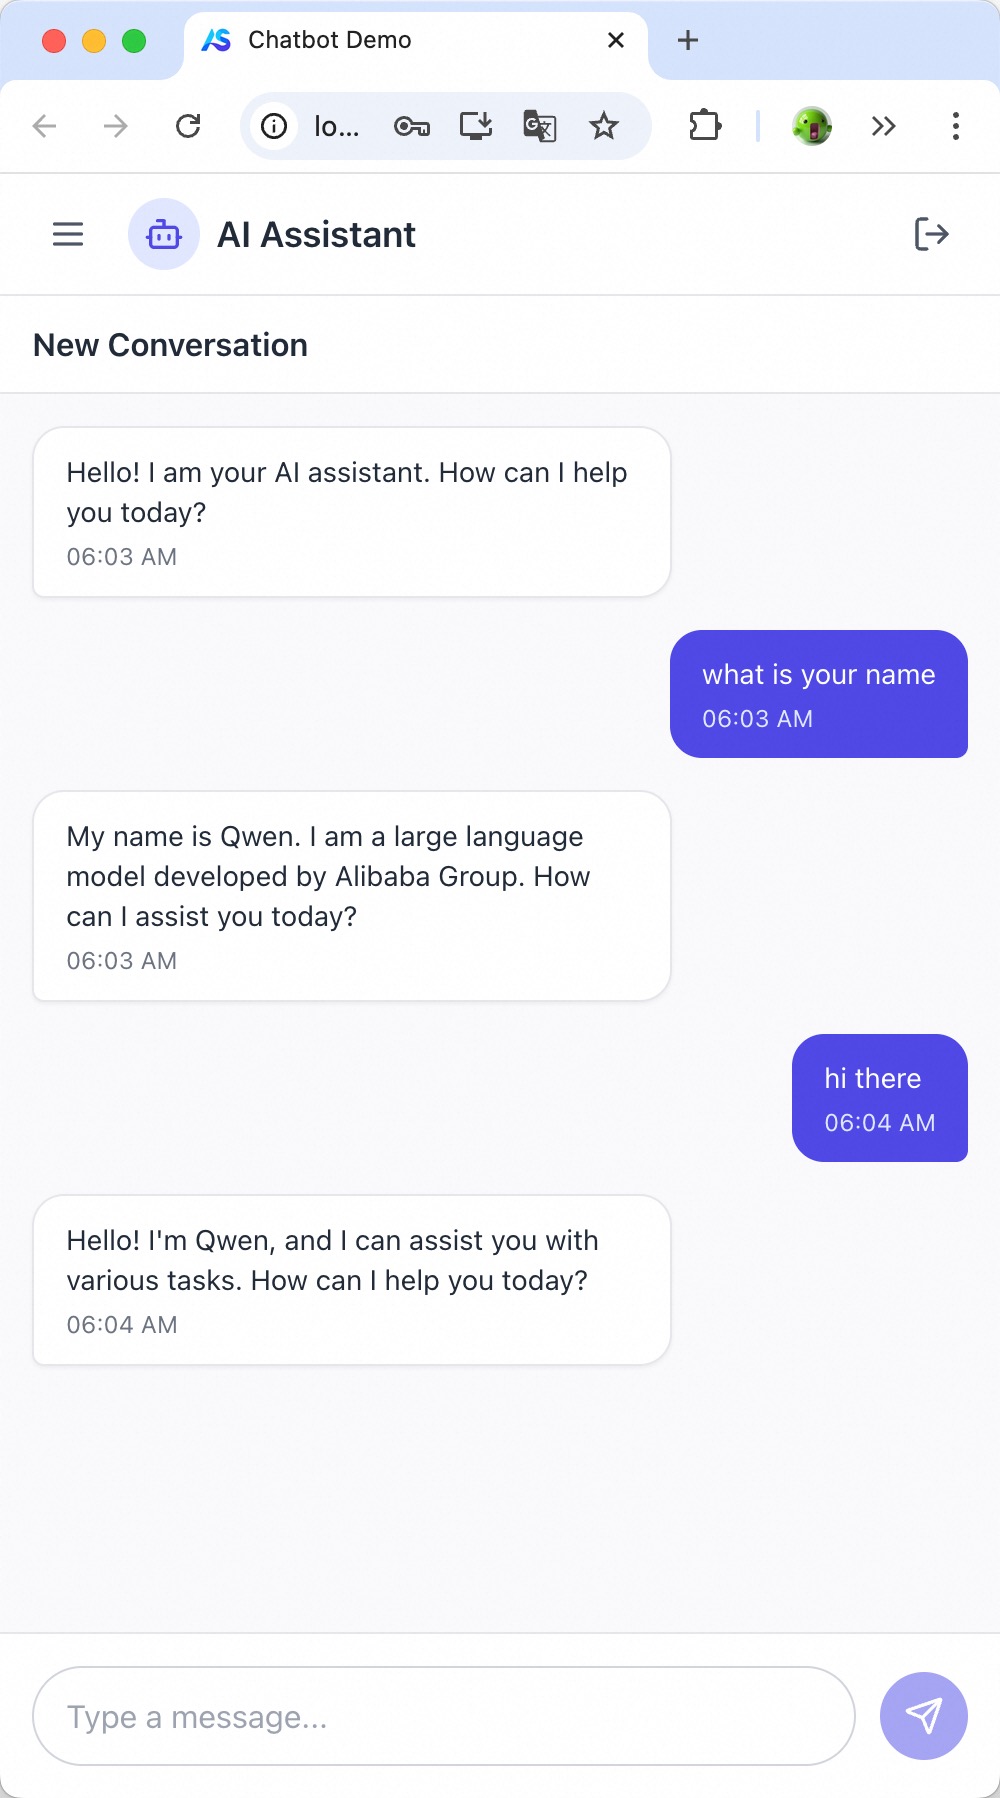
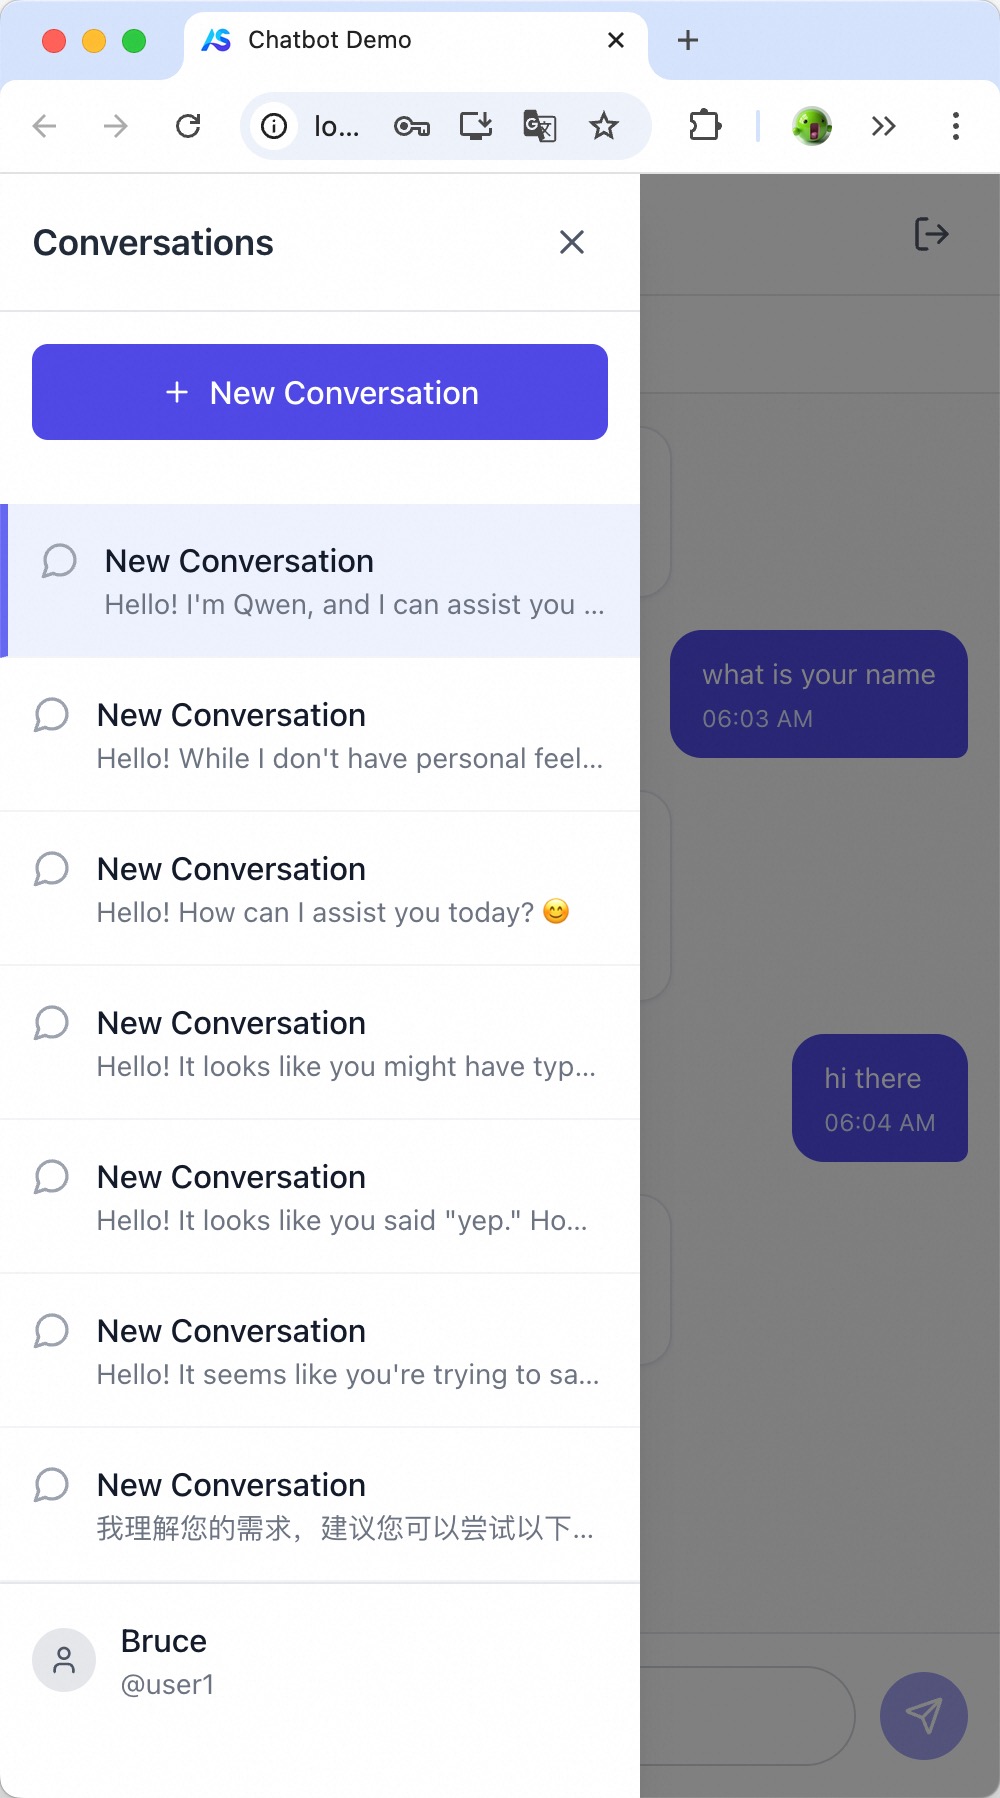
2. (Optional) select a conversation or create a new one.
3. Type a message in the input box and click the "Send" button. e.g. what is your name.
## 🛠️ Features
- Local deployment capabilities
- Multi-user support
- Session management
- Real-time chat interface
- Tailwind CSS styling
## ℹ️ Getting Help
If you have any questions or encounter any problems with this demo, please report them through [GitHub issues]().
## 📄 License
This project is licensed under the Apache 2.0 License - see the [LICENSE](LICENSE) file for details.
## 🍬 Disclaimers
This is not an officially supported product. This project is intended for demonstration purposes only and is not suitable for production use.
## 🌳 Project Structure
```bash
├── backend # Backend directory, contains server-side scripts and logic
│ ├── agent_server.py # Script implementing agent-related server functionalities
│ └── web_server.py # Script acting as the web server, handling HTTP requests
├── frontend # Frontend directory, contains client-side code and resources
│ ├── public # Public folder, used for storing static files that are directly served
│ │ ├── index.html # Entry HTML file for the frontend app
│ │ └── manifest.json # Manifest file describing the web app's metadata, such as name and icons
│ ├── src # Source code folder, contains React components and associated files
│ │ ├── App.css # Stylesheet for the main app component
│ │ ├── App.jsx # JavaScript file for the main app component, written in JSX for React
│ │ ├── App.test.js # Test file for the App component, used for unit testing
│ │ ├── index.css # Global stylesheet affecting the overall appearance of the application
│ │ ├── index.js # Entry point for the React application, renders content into `index.html`
│ │ ├── reportWebVitals.js # Script for reporting web performance metrics
│ │ └── setupTests.js # Configuration file for setting up tests, typically using a testing library
│ ├── package.json # Project dependencies file, lists all npm dependencies and scripts
│ ├── postcss.config.js # Configuration file for PostCSS, used to process CSS with plugins
│ └── tailwind.config.js # Configuration file for Tailwind CSS, customizing styles and themes
└── README.md # Project documentation file, provides basic information and usage instructions
```
## 📖 Overview
This demo demonstrates how to build a chatbot with conversation management using AgentScope Runtime. It includes features such as:
- Multi-user chat support
- Session management
- Real-time messaging
- Local deployment capabilities
The implementation separates concerns between agent logic (backend) and user interface (frontend) for better maintainability.
## ⚙️ Components
### Backend
- `agent_server.py`: Implements the chatbot agent logic and conversation management
- `web_server.py`: Provides web service endpoints for frontend communication
### Frontend
- React-based chat interface
- Tailwind CSS for styling
- Real-time message updates
- Multi-user session support
## 🌵Architecture
The architecture of the demo is depicted in the following diagram:
```mermaid
graph TD;
U[User]
subgraph frontend[Frontend]
FLI[handleLogin]
FLO[handleLogout]
FC[createNewConversation]
FL[loadConversation]
FCS[fetchConversations]
FS[sendMessage]
end
subgraph backend[Backend]
subgraph WS[web_server]
FCS<-->|/api/users/user_id/conversations:GET|WGUC[get_user_conversations]
FL <-->|/api/conversations/conversation_id:GET|WGC[get_converstaion]
FLI<-->|/api/login:POST|WLI[login]
FC<-->|/api/users/user_id/conversations:POST|WCC[create_conversation]
FS<-->|/api/conversations/conversation_id/messages:POST|WSM[send_message]
end
C((Converstaion))
WS<-->DB[SQLite]
WS <-->C
WS <-->UU((User_id))
subgraph AS[agent_service]
ALM[LLMAgent]
ALD[LocalDeployManager]
ASS[InMemorySessionHistoryService]
end
WSM <--> AS
end
U<-->|Request|frontend
```
## 🚃 Dataflow
```mermaid
flowchart LR
A[User Access Application] --> B{Is User Logged In?}
B -->|No| C[Show Login Page]
C --> D[Enter Username/Password]
D --> E[Submit Login Request]
E --> F[Backend Validates Credentials]
F -->|Valid| G[Return User Data]
G --> H[Fetch User Conversations]
H --> I[Display Chat Interface]
F -->|Invalid| J[Show Error Message]
B -->|Yes| I
I --> K{Select Conversation?}
K -->|Create New| L[Create New Conversation]
L --> M[Add Welcome Message]
M --> N[Update Conversation List]
K -->|Select Existing| O[Load Conversation]
O --> P[Fetch Messages]
P --> Q[Display Messages]
Q --> R[Type Message]
R --> S[Send Message]
S --> T[Save User Message]
T --> U[Update UI with User Message]
U --> V[Call AI Service]
V --> W[Process AI Response]
W --> X[Save AI Response]
X --> Y[Update UI with AI Response]
I --> Z[Logout]
Z --> A
style A fill:#FFE4B5
style B fill:#87CEEB
style C fill:#DDA0DD
style F fill:#98FB98
style I fill:#FFA07A
style S fill:#FFD700
style V fill:#87CEFA
```
## 🚀 Getting Started
### Prerequisites
- Python 3.11+
- Node.js
- DashScope API key: you can apply for one at https://dashscope.console.aliyun.com/.
### Install
#### Prepare the database and env
Copy the database file `ai_assistant.db`.
```bash
cd backend
cp ai_assistant_example.db ai_assistant.db
```
You can modify the database file according to your needs.
It contains two initial accounts: user1 and user2.
Copy the `.env.template` to `.env`
```bash
cp .env.template .env
```
The `DASH_API_KEY` is the API key of DashScope.
#### Install the python packages
```bash
pip install -r requirements.txt
```
#### Install the npm packages
```bash
cd ..
cd frontend
npm install
cd ..
```
### Run
#### Run the agent server
Open a terminal and run the agent server.
```bash
cd backend
python agent_server.py
```
It will listen on 8090.
#### Run the web server
Open another terminal and run the web server
```bash
python web_server.py
```
It will listen on 5100
#### Run the frontend
Open another terminal and run the frontend.
```bash
cd frontend
npm run start
```
It will listen on 3000. Open your browser and go to http://localhost:3000.
### Usage
1. Login in with initial account, e.g. user1 and password123.
2. (Optional) select a conversation or create a new one.
3. Type a message in the input box and click the "Send" button. e.g. what is your name.
## 🛠️ Features
- Local deployment capabilities
- Multi-user support
- Session management
- Real-time chat interface
- Tailwind CSS styling
## ℹ️ Getting Help
If you have any questions or encounter any problems with this demo, please report them through [GitHub issues]().
## 📄 License
This project is licensed under the Apache 2.0 License - see the [LICENSE](LICENSE) file for details.
## 🍬 Disclaimers
This is not an officially supported product. This project is intended for demonstration purposes only and is not suitable for production use.